
E3 Anomaly Synthetic Generator / Synthetic anomaly data for inspection AI
Don’t wait for
defective parts.
Start from
good ones.
E3 Anomaly Synthetic Generator is Windows software that takes images of good (OK) products and texture images, and creates synthetic NG images containing defects synthesised with this software, paired with ground-truth masks that mark where each defect is, pixel by pixel. Output is written in an MVTec-compatible folder structure. You can prepare evaluation and training data for inspection AI without waiting for defective parts to accumulate.
Free trial: 14 days, no feature limits, not for commercial use
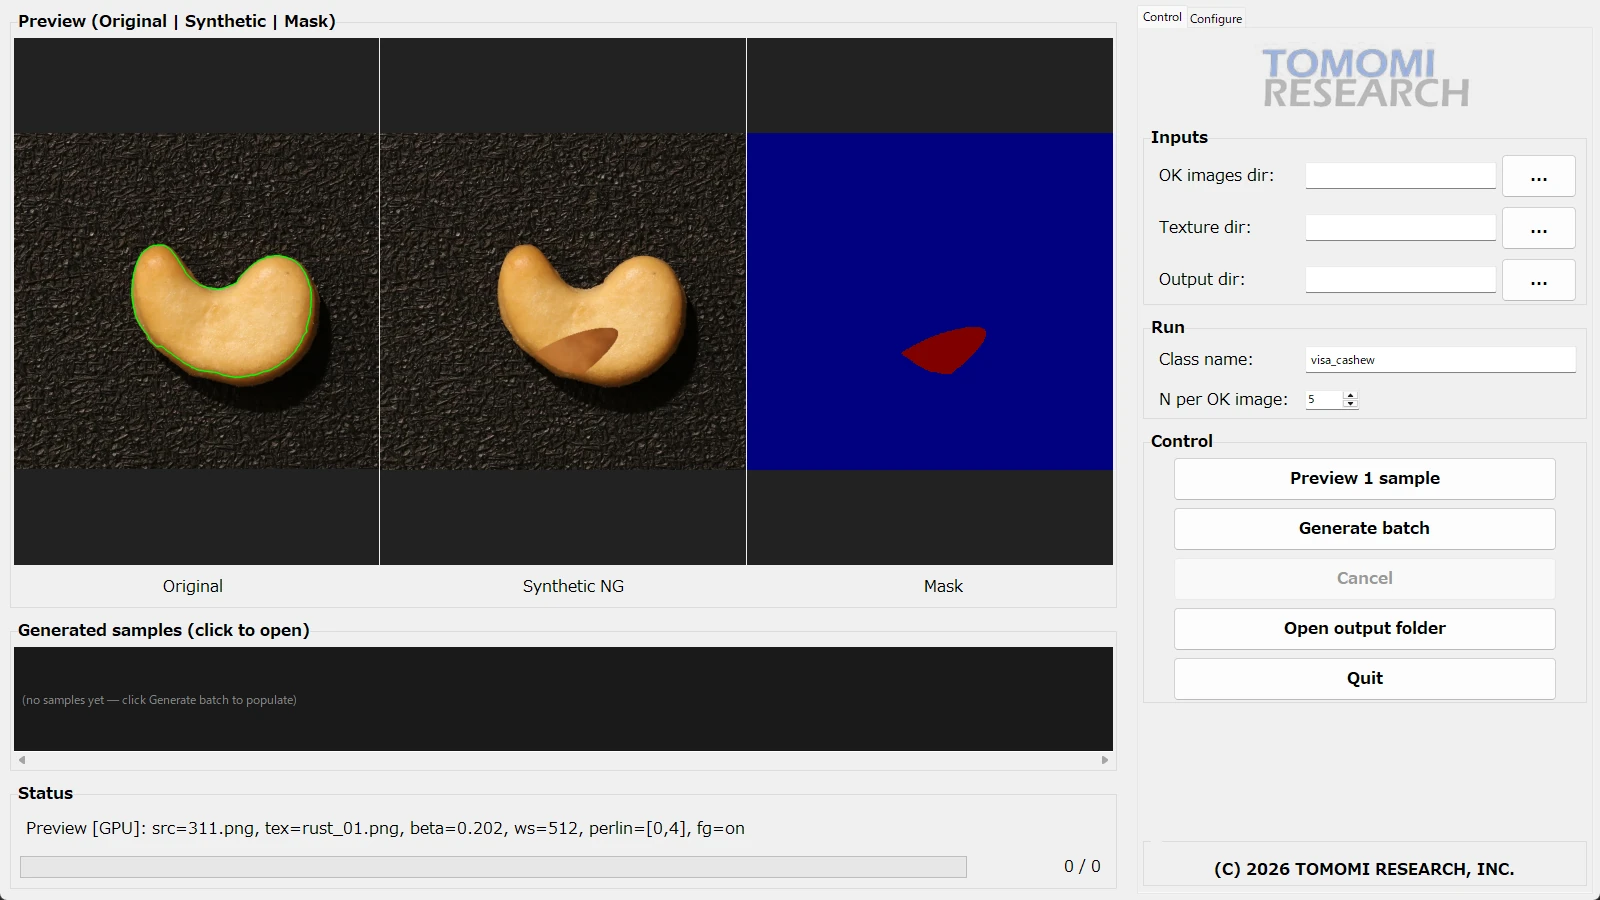
The main screen. From left: previews of the original image, the synthetic NG image and the mask. The green line on the original image is the area where defects may be placed. The defect was synthesised with this software.
Source image: VisA dataset (Zou et al., "SPot-the-Difference Self-Supervised Pre-training for Anomaly Detection and Segmentation", ECCV 2022), CC BY 4.0, https://github.com/amazon-science/spot-diff — modified by TOMOMI RESEARCH with defects synthesised using E3 Anomaly Synthetic Generator.
What it does
The same image,
with only the defect added.
On the left, the original image of a good product; on the right, an NG image synthesised with this software. The only pixels that change are the defect and the blended edge just around it. Everything beyond that stays as it was in the original (*1).
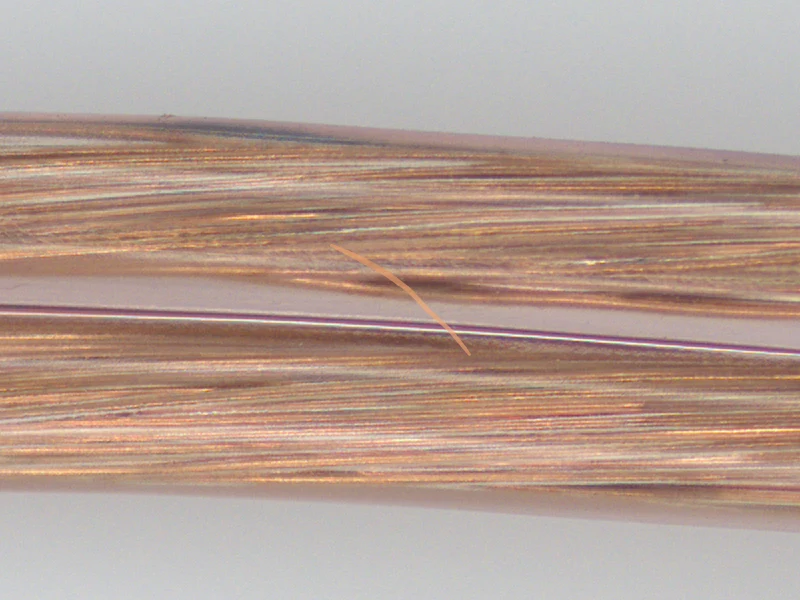
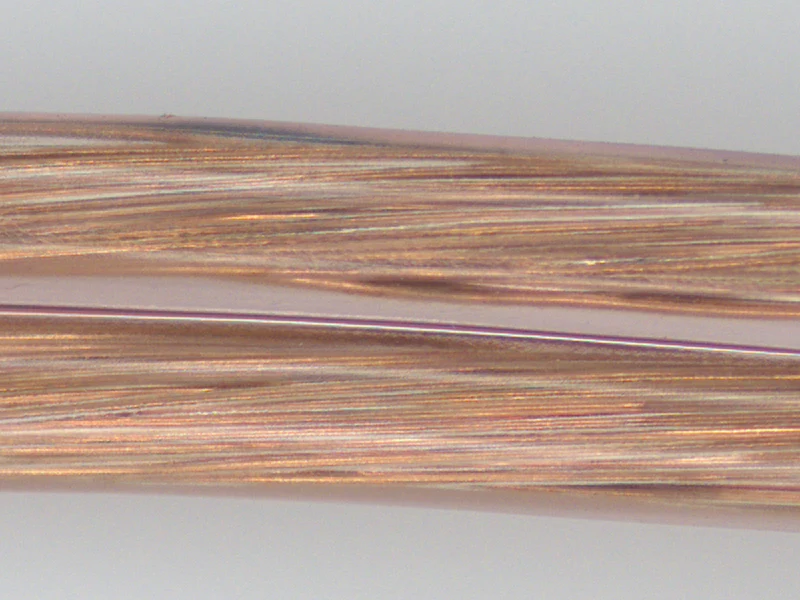
◀ Drag to compare ▶
A line-shaped defect synthesised with this software on the surface of enamel wire.
* The defect on the right was synthesised with this software. This is not a photograph of a real defective part.
* The examples shown were selected from images synthesised with this software. The synthesis settings were also changed from the application defaults to make the defects easier to see.
*1 When exported in the same colour format as the original image. If a colour image is exported in greyscale, the entire image is converted to luminance (brightness). The blended edge (a few pixels from the edge of the ground-truth mask) is not included in the ground-truth mask.
* This does not guarantee the detection rate or accuracy of any inspection AI that uses synthetic NG images.
The problem
Wait as you may,
the defects won’t line up.
To find out how much an inspection AI can catch, you need examples of defects and ground truth showing where they are. Even with methods that train on good images alone, evaluation still needs examples of defects. Defects, however, do not appear when you need them, or in the types you need.
Before mass production, there are no defects yet
You want to set up the evaluation during ramp-up, but no defective parts have appeared to evaluate with. While you wait for them, the evaluation cannot be built.
The defects that do appear are skewed
Defects are rare, and the ones that appear tend to be of the same few types. The list of defects you need caught and the list of defective parts on hand do not always match.
Ground-truth masks are painted by hand, one at a time
A mask that marks the defect pixel by pixel is painted by a person zooming in on the image. That effort adds up with every image.
The answer
Prepare the defects
you need to test, first.
E3 Anomaly Synthetic Generator synthesises defects onto your own good images and exports, at the same time, a ground-truth mask showing where each defect is. Decide the types and sizes of defect you want to test, and create evaluation and training data without waiting for defective parts to accumulate.
Defective parts appear — wait until they do
↓
Collect them — the types are not yours to choose
↓
Image them
↓
Paint ground-truth masks by hand — one at a time
↓
Evaluation and training data
The evaluation cannot start until the defective parts are in.
Good images + texture images
↓
Choose the defect types and the placement area
↓
Synthetic NG images + ground-truth masks — exported in pairs
↓
Evaluation and training data (MVTec-compatible)
You decide the types and sizes of defect.
* Synthetic NG images do not replace verification with real defective parts. When real defective parts become available, verify with them as well.
What you get
Synthetic NG images
and ground-truth masks,
in pairs.
From each good image, the software exports a synthetic NG image and a binary ground-truth mask showing where the defect is, paired under the same number. The output keeps the pixel dimensions of the original good image.
Your own good image.
The good image you put in. It is copied to train/good in the output folder.
The image with the defect.
Outside the defect and its blended edge, the image is as it was (*1). Saved to test/synthetic.

Where the defect is, pixel by pixel.
A binary PNG: defect in white (255), everything else in black (0). Saved to ground_truth/synthetic.
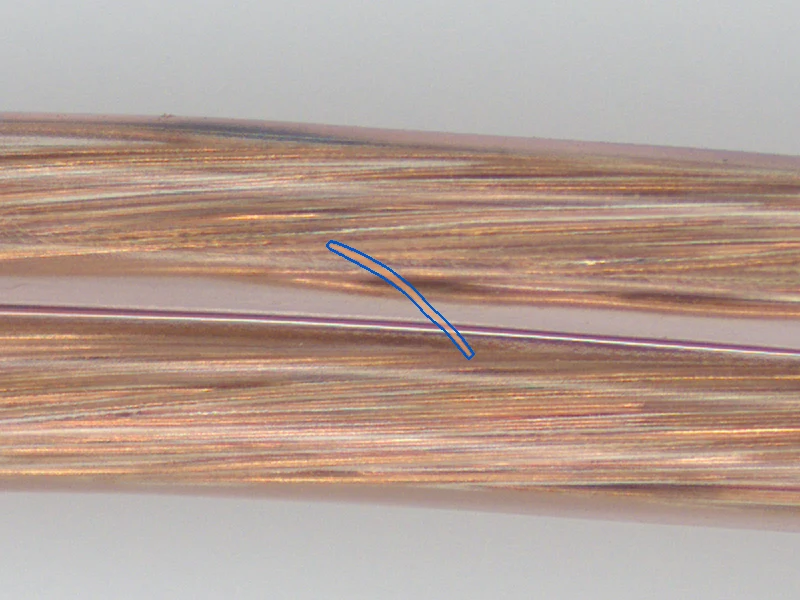
Seen together.
The ground-truth mask laid over the synthetic NG image, to show that the defect and the mask line up.
* The defects in 02 to 04 were synthesised with this software. These are not photographs of real defective parts.
* The overlay in 04 is a figure made for explanation and is not part of the software’s output.
*1 When exported in the same colour format as the original image. The few pixels just outside the edge of the ground-truth mask contain a faint change that blends the defect into the image.
* 01 to 04 are the same position from the same synthesis run, cropped for display. The blue line in 04 is a guide drawn outside the edge of the ground-truth mask.
MVTec-compatible folder structure
Output is written in an MVTec-compatible folder structure, that is, the same folder layout as the public anomaly detection dataset MVTec AD. It can go straight to any inspection AI that reads this format, for training and evaluation.
<output folder>/<class name>/
├── train/good/ good images (copies)
├── test/synthetic/ synthetic NG images
├── ground_truth/synthetic/ ground-truth masks (0 / 255)
└── run.json generation settings and a per-image record
Key features
Decide the defect type
and where it may go.
The shape of the defect comes from one of two methods; the area where defects may be placed is set in one of three ways. Where inside that area each defect goes is decided at random by the software. Before exporting, you can check the result with a single-sample preview and with a live preview that updates as soon as you change a setting.
Blotches and stains.
Texture is blended into an area shaped by Perlin noise.
Set the shape and the size.
Choose from six types and set the count, length and width in pixels.
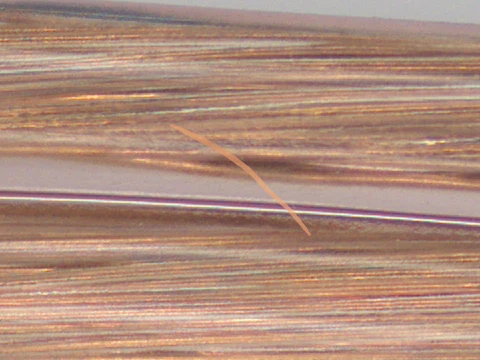
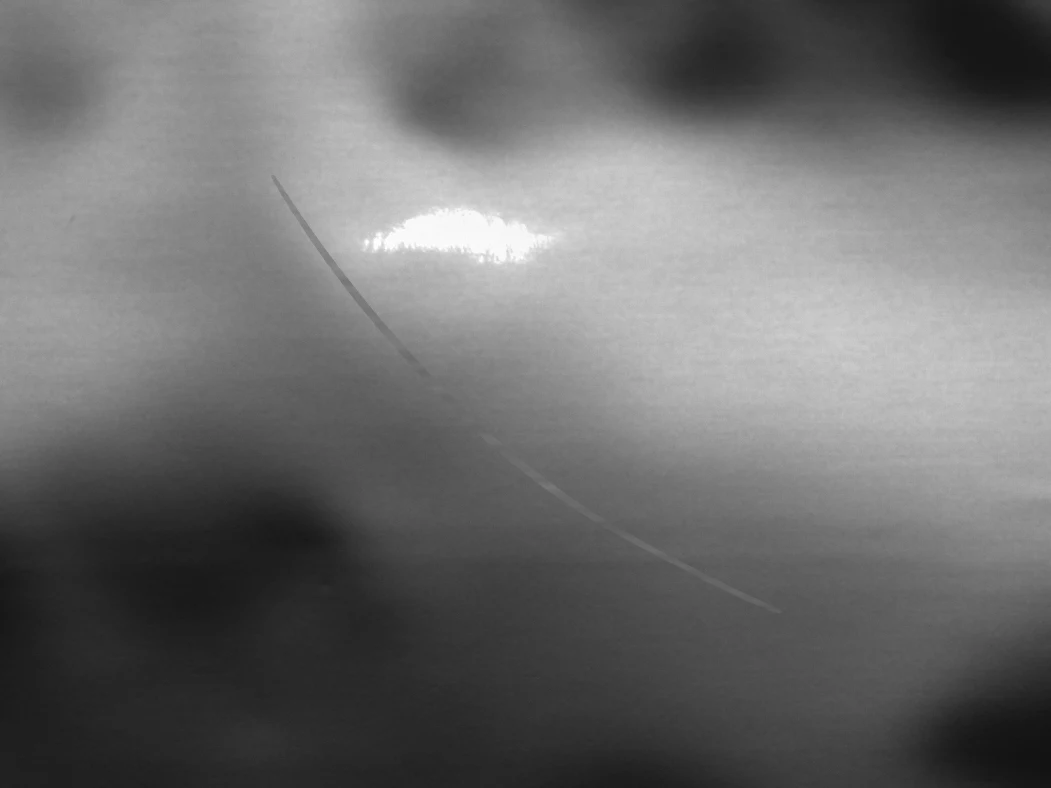
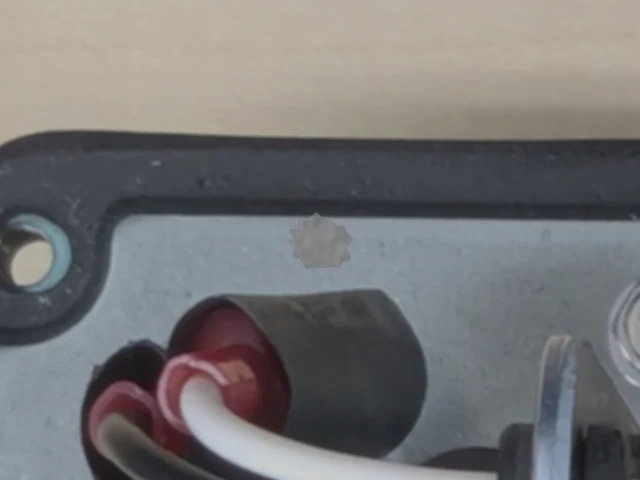
All defects in these images were synthesised with this software. There are six defect types (Scratch, Dent, Foreign matter, Chip, Spot and Lump); the examples shown are Scratch and Foreign matter (2 of the 6 types).
Make a blotch, or set the shape.
The Perlin method blends texture into an area shaped by a smoothly varying random pattern (Perlin noise), creating blotchy, stain-like defects. The defect-type method lets you choose from six types and set the count, length and width in pixels.
— Scratch
— Dent
— Foreign matter
— Chip
— Spot
— Lump
Texture = the image that serves as source material for how the defects look. A texture set created by TOMOMI RESEARCH is included. Photographs of defects you already have can also be used as textures.
Keep defects on the product.
In the mask editor, circle the product and its outline is extracted automatically; the inside becomes the area where defects may be placed. You can also draw a box, or specify a mask image file. If the product sits in a different position in each image, the outline can be extracted again for each good image.
— Automatic outline extraction
— Box
— Mask image file (one shared by all images, or one per image)
* What you specify is the area where defects may be placed, not the position of each defect. With the Perlin method, a defect may extend a few pixels beyond the edge of the area.
Outside the defect and its edge, the original stays.
Output keeps the resolution of the original good image. Apart from the defect and the blended edge just around it, the pixels match the original bit for bit (not a single pixel value changes). Greyscale export is an 8-bit, single-channel PNG, the same format as FORESIGHT STEREO 2D Texture / 3D Surface images.
* The bit-for-bit match applies when exporting in the same colour format as the original image. Because the ground-truth mask marks pixels where the defect is above a set strength, the few pixels just outside the edge of the mask contain a faint change that blends the defect into the image.
Make the same image again.
Specify a seed (the starting value for the random numbers) to recreate the same image from the same settings. The generation settings, and for each image the source image, texture, seed and defect type, are recorded in run.json. Use it as a record for tracing the conditions later, and when splitting an evaluation by defect type.
Where it fits
It doesn’t judge OK/NG.
It prepares the data.
TOMOMI RESEARCH builds inspection in three layers: the sensor, the anomaly detection engine and the inspection systems. E3 Anomaly Synthetic Generator joins the family of the anomaly detection engine E3 ENGINE. It makes no OK/NG decisions; its role is to prepare the evaluation and training data that goes to the anomaly detection engine. It is sold separately from E3 ENGINE and works on its own.
FORESIGHT STEREO®
Takes four outputs from one capture: LIVE / 2D Texture / 3D Surface / Surface Normal.
E3 ENGINE®
An AI anomaly detection engine that learns from good products only and returns one of three verdicts: OK / Human_Check / NG.
TR series
Systems that bring the sensor and the decision together in one unit that runs on the floor. From a benchtop observation unit to continuous inspection on a line and robot-mounted inspection.
E3 Anomaly Synthetic Generator
Good (OK) images
↓
E3 Anomaly Synthetic Generator — synthesis
↓
Synthetic NG images + ground-truth masks — handed over as evaluation and training data (MVTec-compatible)
↓
Anomaly detection engine (E3 ENGINE, or another inspection AI, third-party or your own)
It makes no OK/NG decisions.
It can be used to prepare data for E3 ENGINE. Because the output is MVTec-compatible, it can also go to other inspection AI that reads this format; it is not limited to E3 ENGINE. E3 ENGINE learns from good images only. What this software provides is NG images and ground-truth masks for preparing evaluations. Evaluations for setting thresholds also need examples of real defective parts.
* This software makes no OK/NG decisions. Deciding is the role of inspection AI such as E3 ENGINE.
Specifications
Install it
on a Windows PC.
Install it with the installer, then start by pointing it to a folder of good images and a folder of texture images. It runs on the CPU on a PC without a GPU.
| Category | Software for generating synthetic NG data (Windows desktop application) |
|---|---|
| OS | Windows 11 (64-bit) |
| GPU | Recommended: an NVIDIA GPU with 6 GB or more of VRAM (such as RTX 3060 Laptop). Runs on the CPU if no GPU is available |
| Processor and memory | Intel or AMD CPU / 8 GB or more of memory |
| Free disk space | 7 GB or more |
| Installation | Installer |
| Licensing | One licence per PC, perpetual (one-time purchase), first-year maintenance included. Annual maintenance from the second year |
| Licence activation | An internet connection is required at startup. The licence is tied to one PC |
| Input | A folder of good (OK) images / a folder of texture images (subfolders are read too) |
| Input image formats | Common image formats such as PNG, JPEG, TIFF and BMP |
| Synthesis methods | Perlin (blotches and stains) / defect type (Scratch, Dent, Foreign matter, Chip, Spot, Lump; count, length and width set in pixels) |
| Placement area | Mask editor (automatic extraction of the product outline / box), or a mask image file (one shared by all images / matched per image from a folder). The outline can be extracted again for each good image |
| Output | Synthetic NG images / ground-truth masks (binary PNG, 0 and 255) / copies of the original images / run.json |
| Folder structure | MVTec-compatible (train/good / test/synthetic / ground_truth/synthetic) |
| Resolution | Same as the original good image |
| Greyscale output | 8-bit, single-channel PNG (the same format as FORESIGHT STEREO 2D Texture / 3D Surface images) |
| Images generated | 1–200 per good image |
| Preview | Single-sample preview / live preview as settings change / progress display during batch generation |
| Reproducibility | Specify a seed to recreate the same image. The generation settings, and for each image the source image, texture, seed and defect type, are recorded in run.json |
| Textures | A texture set created by TOMOMI RESEARCH is included. Your own images can also be used. DTD is not bundled; we tell you where to obtain it (its terms of use are set by the distributor) |
| User interface language | English |
| Japanese folder and file names | Supported |
| Network | Required for licence activation at startup. The first time automatic outline extraction is used, the required data is downloaded |
| Free trial | 14 days, no feature limits, not for commercial use |
* This software creates image data for evaluation and training. It makes no OK/NG decisions.
* Defects synthesised with this software are not the same as real defective parts. Using synthetic NG images does not guarantee the detection rate or accuracy of any inspection AI, and does not replace verification with real defective parts.
* Automatic outline extraction runs faster on a GPU.
* An internet connection is required for licence activation each time the software starts. The first time automatic outline extraction is used, the required data is downloaded.
Licensing
The licence
and its terms.
One licence per PC. It is perpetual (a one-time purchase), and the first year of maintenance is included. From the second year, maintenance is an annual contract. We send a quote on request.
| Standard licence | One licence (one PC), perpetual (one-time purchase), first-year maintenance included |
|---|---|
| Annual maintenance | From the second year. One major update and one minor update per year, plus technical support |
| Academic licence | For universities and public research institutions, non-commercial use. One licence (one PC), perpetual (one-time purchase), first-year maintenance included. Annual maintenance from the second year |
| Quotation | On request. Tell us the number of licences and the intended use |
* The licence is tied to the PC on which the software is first started. To use it on another PC, ask us to issue a new key or to release the link.
* Annual maintenance (including first-year maintenance) covers one major update and one minor update per year, plus technical support.
From trial to purchase
From request
to purchase.
The trial has the same features as the full version and can be used for 14 days. It is not for commercial use. Check whether the defects and ground-truth masks you have in mind can be created from your own good images before you decide.
Request the trial
Through our contact page. Under “What this is about”, choose “A free trial of E3 Anomaly Synthetic Generator (software)”.
Receive an email
Within 2 business days of your request, we email you a licence file (license.lic) and a link to download the installer.
Install it
Select license.lic during installation. An internet connection is required at startup.
Try it for 14 days
No feature limits. Not for commercial use.
Request a quote
Through our contact page. Tell us the number of licences and the intended use.
Purchase
After you place your order, we email you the product licence (license.lic).
* The download link is sent by email only (it is not posted on this page).
Free trial: 14 days, no feature limits, not for commercial use
Related
Where the data
goes next.
This software takes care of preparing data for evaluation and training, and no more. Capturing the good images and returning OK/NG verdicts each have their own products.
Anomaly detection engine
Learns from good products only and returns one of three verdicts: OK / Human_Check / NG. One of the places this software’s output can go.
Read more →
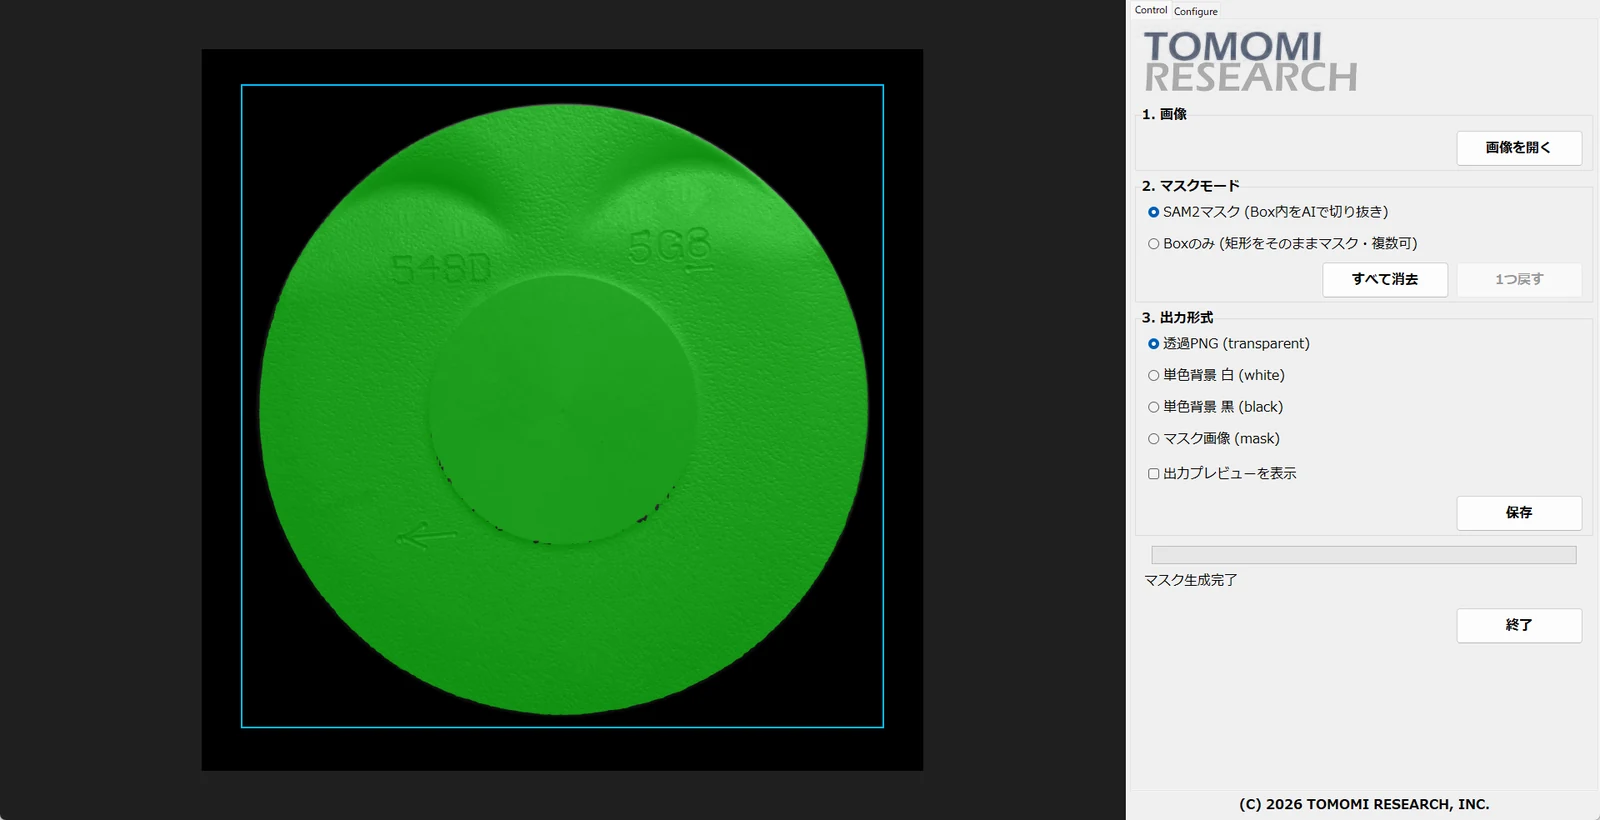
Industrial AI masking
Standalone software that creates a mask of the inspection target when you enclose it with the mouse. Pre-processing that decides where to look; it makes no OK/NG decisions.
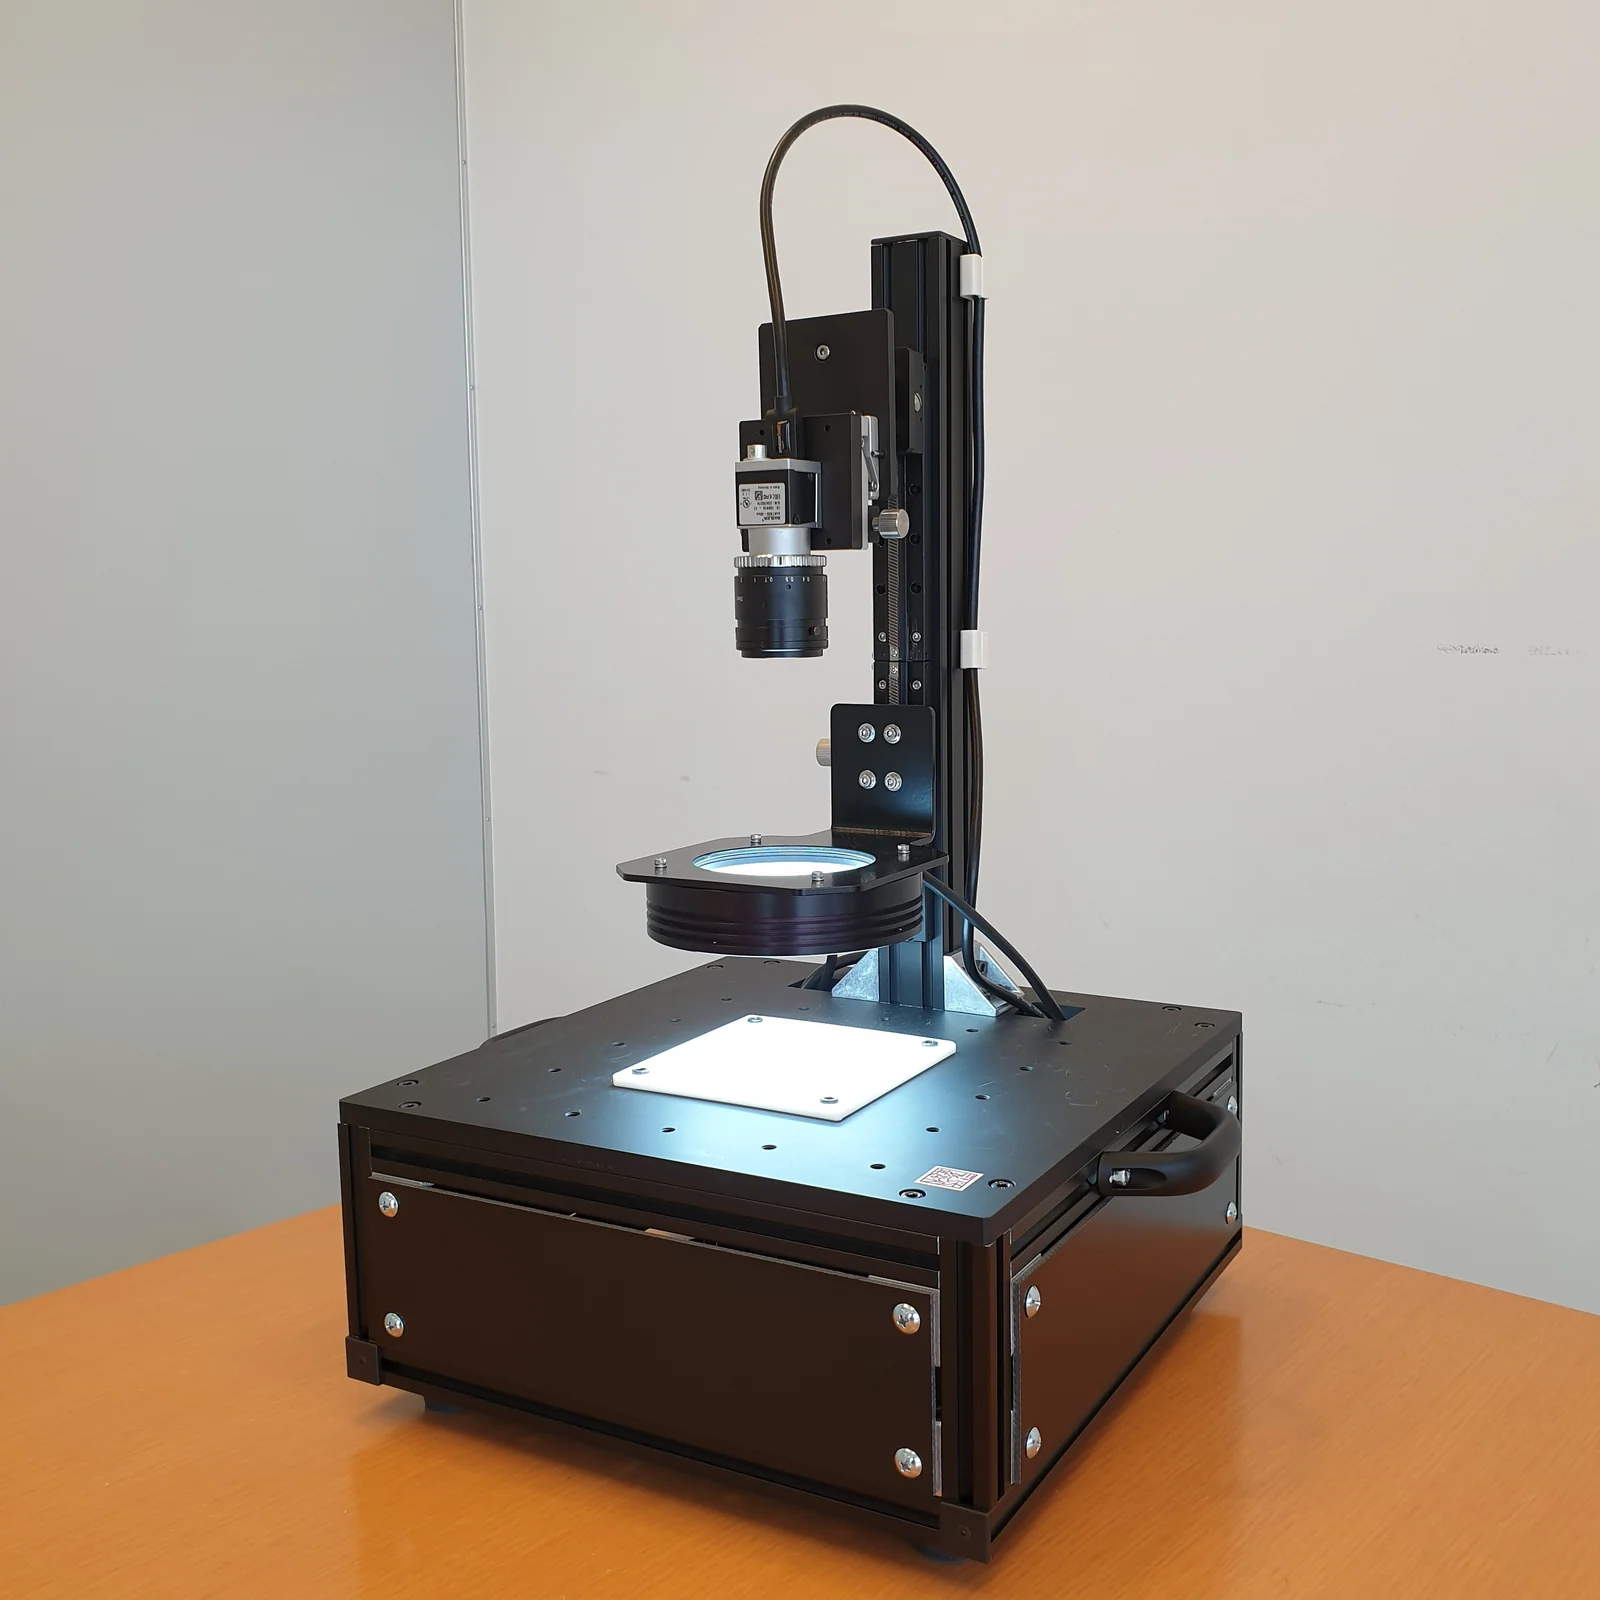
Observation unit
An observation unit that takes four views from one capture. One of its uses is collecting machine-learning datasets: the side that captures the good images.
Read more →
Get started
First, try it
on your own good images.
Rather than reading about it, the quickest way to judge this software is to put in your own good images and see whether the defects and ground-truth masks you have in mind come out. The trial runs for 14 days, with no feature limits, and is not for commercial use. If you already know how many licences you need and what for, ask for a quote at the same time.
Free trial: 14 days, no feature limits, not for commercial use
Tel +81-466-54-9003 / info@tomomi-research.com / https://www.tomomi-research.com/en/