
[Tech Blog] Basler ace 2 Camera: How to Configure Triggers in Pylon Viewer
 kotai2003
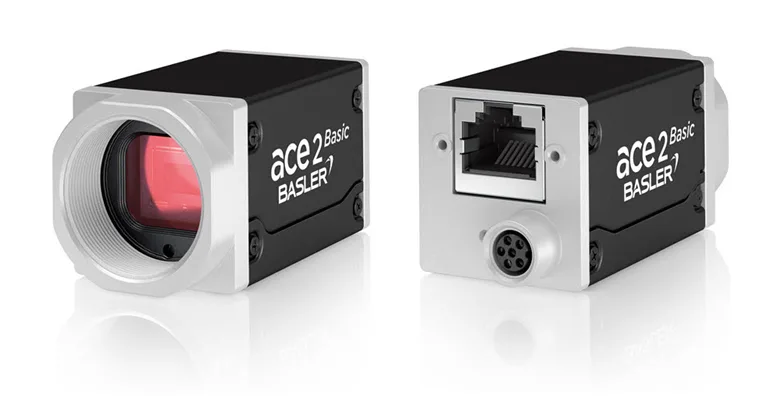
The Basler ace 2 (a2a3840-45ucPro) is a high-performance area scan camera with a USB3 Vision interface. To get the most out of this camera, proper trigger settings are essential. This article explains in detail how to set up a software trigger (SW trigger) and a hardware trigger (HW trigger) using "Pylon Viewer", the powerful software provided by Basler.
Getting started: preparing Pylon Viewer
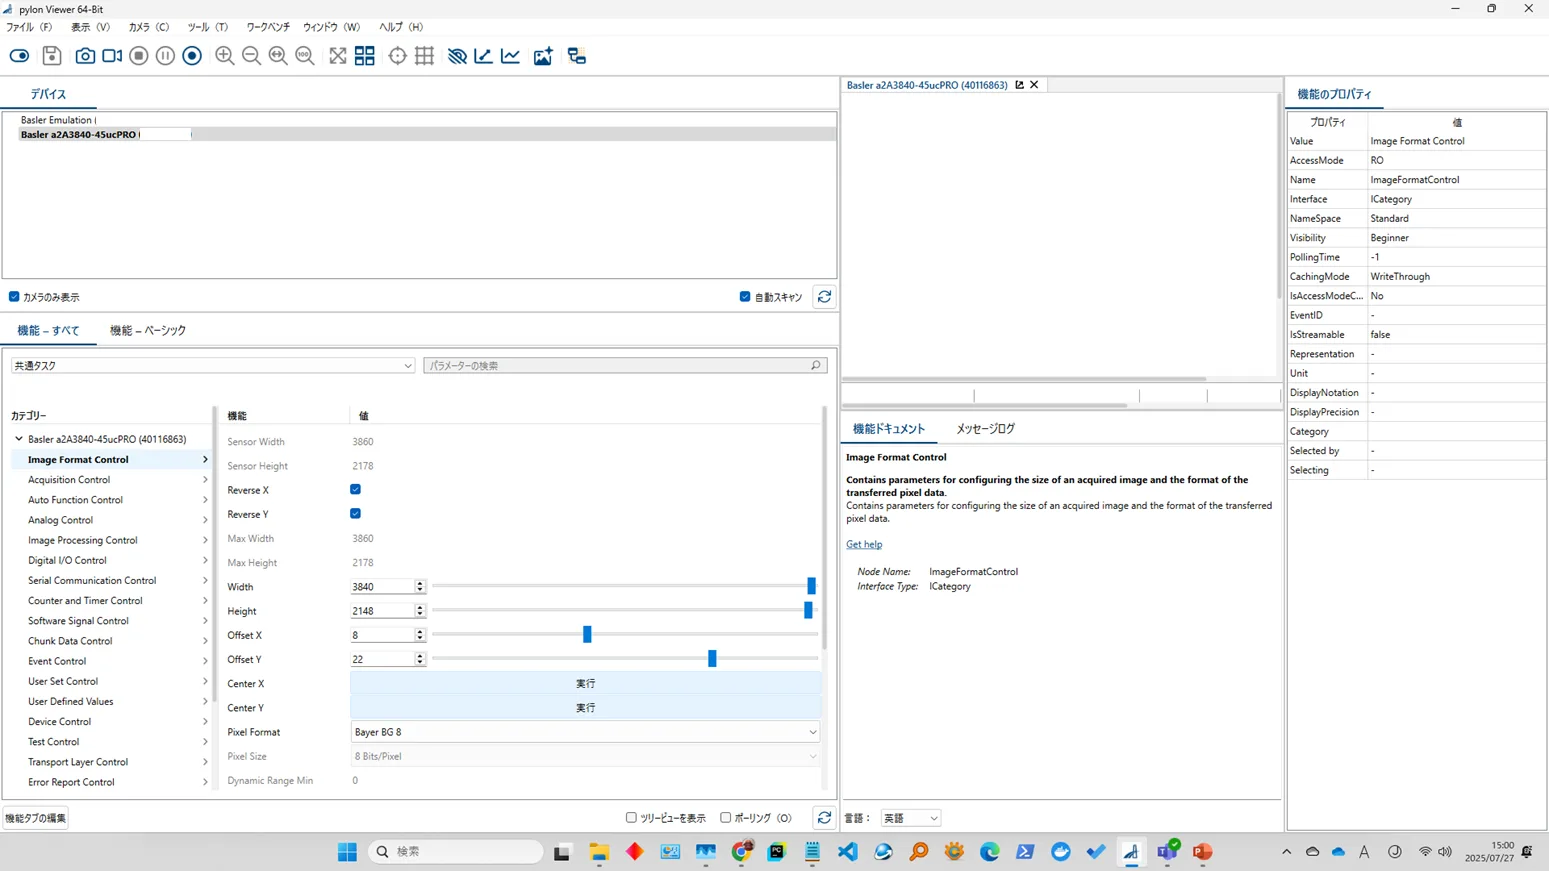
- Connect the camera: Connect the Basler ace 2 camera to a USB 3.0 port on the PC and power it on.
- Launch Pylon Viewer: Launch Pylon Viewer, which is included in the Pylon software suite.
- Connect to the camera: Double-click the camera shown in the "Devices" tree of Pylon Viewer (
Basler a2a3840-45ucPro (xxxxxxxx)) to connect to it. - Show the GenICam Feature Browser: When you connect to the camera, the "GenICam Feature Browser" usually opens automatically (it appears in the lower-left pane of the Pylon Viewer window). All settings are made in this GenICam Feature Browser.
1. How to set up a software trigger (SW Trigger)
A software trigger starts image acquisition on the camera by a button click in Pylon Viewer or a command from the SDK (software development kit). It is suited to debugging, checking settings, prototype development, and applications where timing precision is not very strict.
-
Go to the Acquisition Control section:
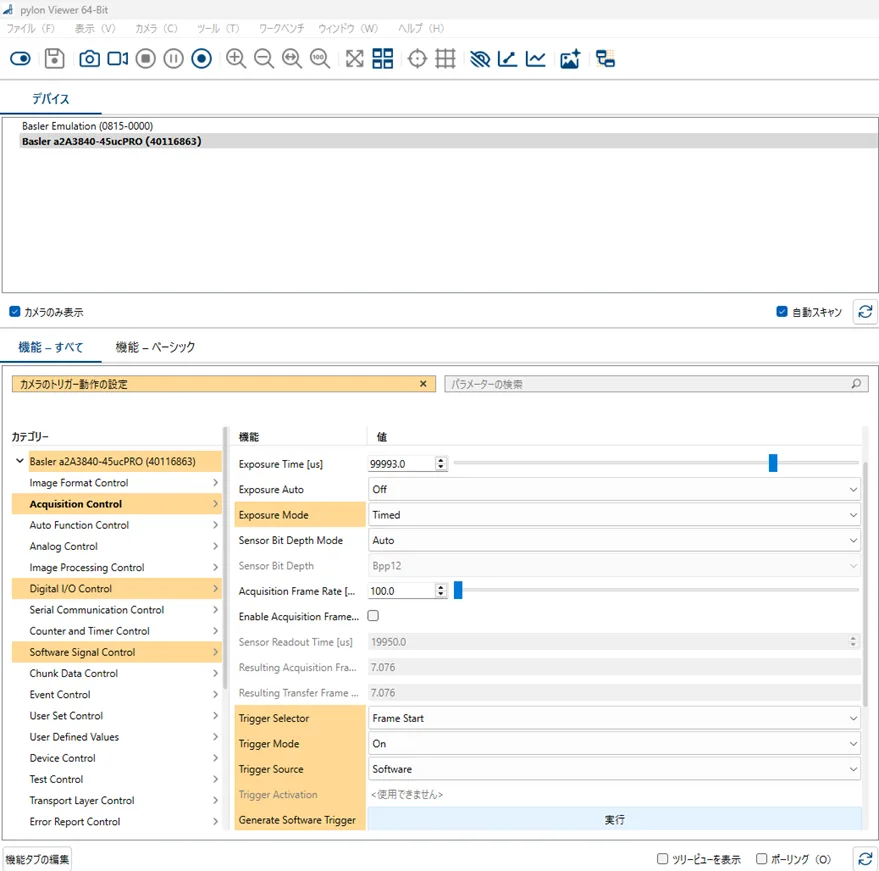
In the tree on the left of the GenICam Feature Browser, expand the "Acquisition Control" section.
-
Set TriggerMode to On:
Change the TriggerMode value from "Off" to "On". This enables the camera's trigger function.
-
Set TriggerSource to Software:
Set TriggerSource, located below TriggerMode, to "Software". This tells the camera that the trigger signal will come from a software command.
-
Set TriggerSelector to FrameStart:
TriggerSelector selects which stage of the camera the trigger event applies to. Normally you want to trigger the start of exposure of a new frame, so set it to "FrameStart".
-
Set TriggerDelayAbs (normally 0.0):
TriggerDelayAbs specifies, in microseconds, the delay between detection of the trigger signal and the actual start of image exposure. With a SW trigger you normally want to capture the image immediately after issuing the command, so set it to "0.0". There is no need to change it unless you have a specific reason.
-
Check operation:
Click the "Software Trigger" button (the lightning-bolt icon) on the Pylon Viewer toolbar. Confirm that the camera captures one image each time you click.
This completes the SW trigger setup.
2. How to set up a hardware trigger (HW Trigger)
A hardware trigger starts image acquisition by an electrical signal from an external device (such as a sensor or PLC) connected to the camera's physical I/O port. It is widely used in industrial applications that require precise synchronization or real-time performance.
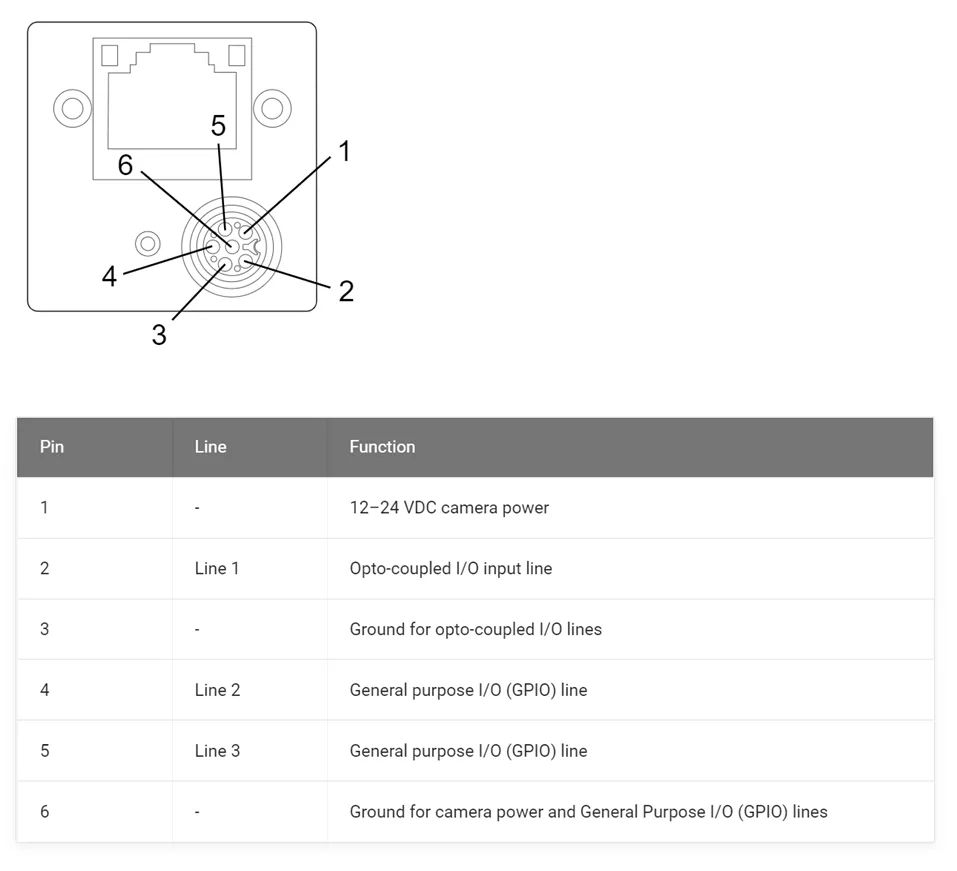
Before setting up a HW trigger, make sure the external trigger signal is correctly wired to the camera's I/O connector (usually M8 or M12). Always refer to the I/O pin assignment in the camera's user manual and identify the pin that receives the trigger signal (e.g. Line 1).
-
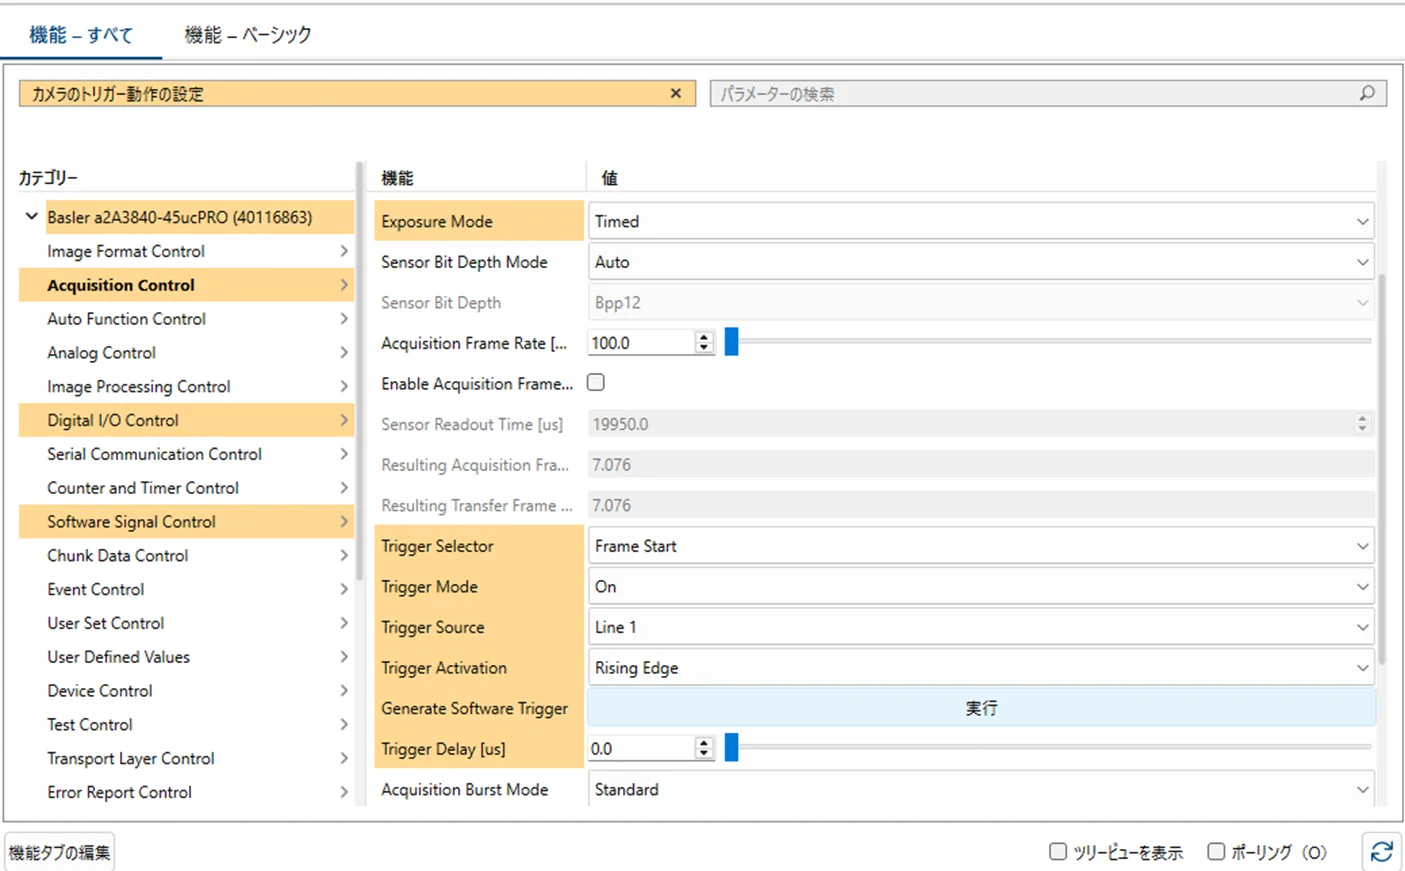
Go to the Acquisition Control section:
In the tree on the left of the GenICam Feature Browser, expand the "Acquisition Control" section.
-
Set TriggerMode to On:
Change the TriggerMode value from "Off" to "On".
-
Set TriggerSource to the external line:
Set TriggerSource to the physical input line to which the external trigger signal is connected (e.g. "Line1"). This is the line corresponding to the pin you identified in the manual earlier.
-
Set TriggerActivation (most important):
TriggerActivation determines on which edge of the external trigger signal (rising or falling) an image is captured.
-
RisingEdge: triggers when the signal changes from Low to High. -
FallingEdge: triggers when the signal changes from High to Low. -
AnyEdge: triggers on both the rising and falling edges of the signal.
Set this correctly to match the characteristics of the external trigger signal (e.g. RisingEdge if the voltage rises the moment the sensor turns ON).
-
-
Set TriggerSelector to FrameStart:
As with the SW trigger, you want to trigger the start of exposure of a new frame, so set it to "FrameStart".
-
Set TriggerDelayAbs (normally 0.0):
Normally set it to "0.0". Adjust it only when precise timing alignment with external equipment is required.
-
Check and configure the Digital I/O Control section:
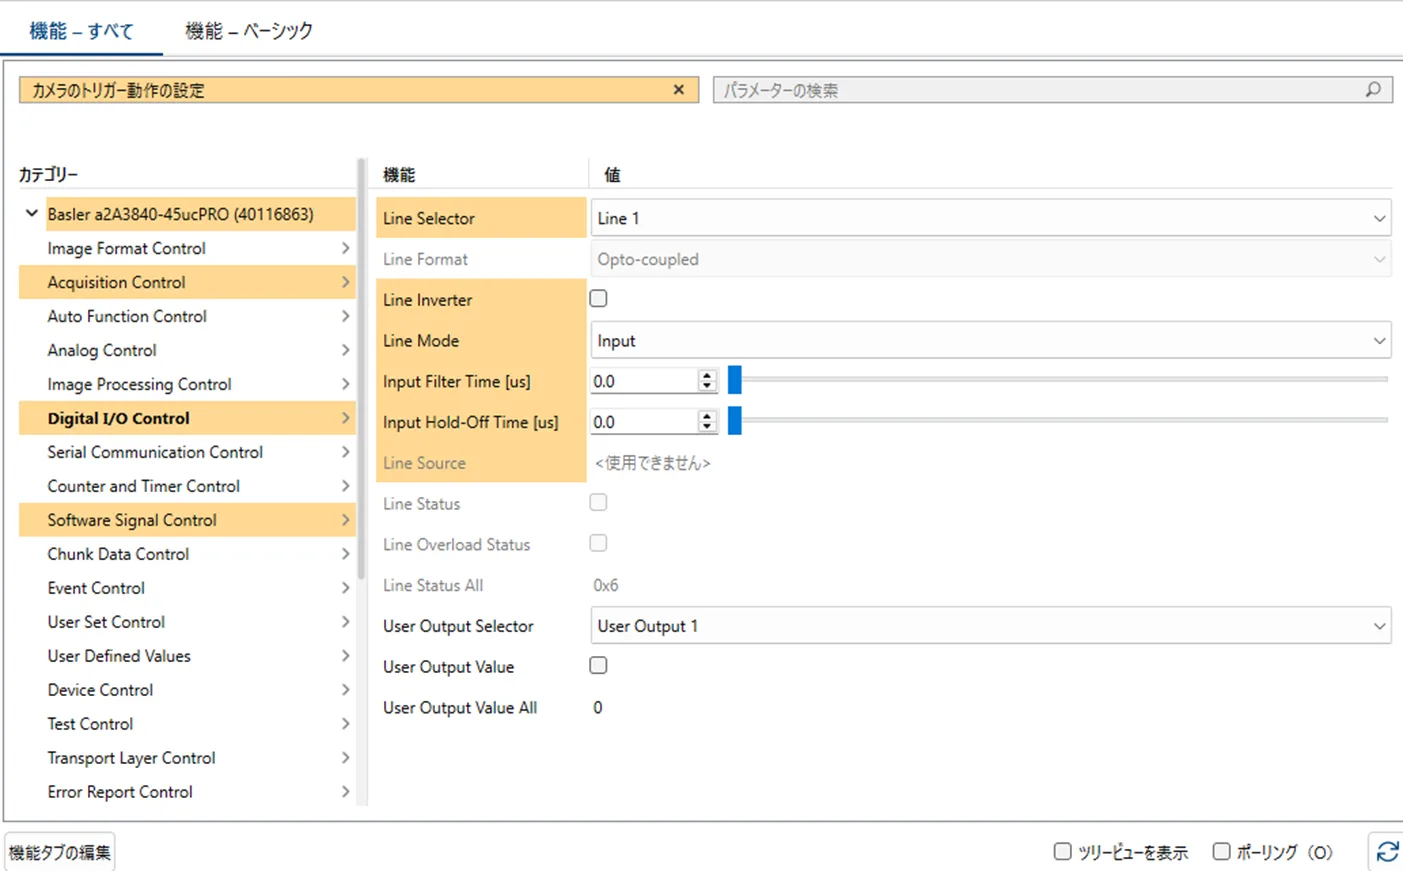
To make the HW trigger more stable, we recommend also checking or configuring the following items.
Line Selector: select the line that receives the trigger signal (e.g.Line 1).Line Mode: confirm that the selected line is set to "Input". For a HW trigger it is used as an input.Input Filter Time [us]: if the external signal has noise or chattering, setting this value above 0.0 (e.g. 100.0 µs) ignores short signal fluctuations and prevents false triggers.Line Inverter: check this if the polarity of the external signal is the opposite of what the camera expects. Normally leave it unchecked.
-
Check operation:
Click the "Grab" button in Pylon Viewer and input the external trigger signal to the corresponding I/O pin of the camera. Confirm that images are captured according to the trigger conditions you set. If no image is acquired, recheck the I/O wiring, signal level, TriggerActivation and Input Filter Time settings.
Other important settings: Acquisition Control/Exposure Mode
When using trigger mode, the exposure time (shutter speed) setting is also very important.
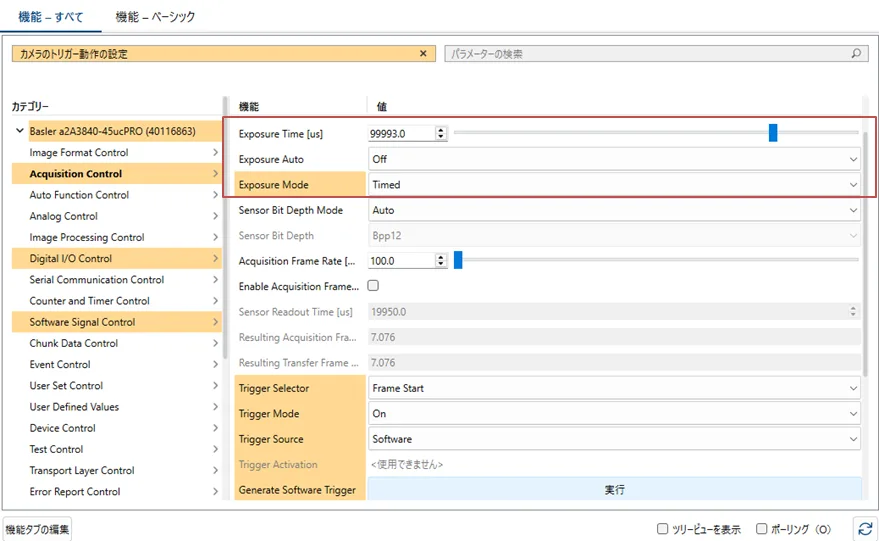
Exposure Mode:Timed: the user sets the exposure time directly. This is used in most applications that use a HW trigger.ExposureTimeAbslets you set the exposure time in microseconds.Auto(Once/Continuous): the camera adjusts the exposure time automatically.Once: choose this when you want the camera to auto-adjust once, find the optimal exposure time and fix it. After it runs,Exposure Autoautomatically returns toOffand theExposureTimeAbsvalue at that moment is fixed. This is the most common way to find the optimal exposure time.Continuous: the camera adjusts continuously. This is convenient in environments where the light level varies, but because the exposure time becomes unstable, it may affect cycle time and motion blur of moving objects.
For precise applications that use a HW trigger, it is generally recommended to first set Exposure Auto to Once to find the optimal ExposureTimeAbs, then return Exposure Auto to Off and operate with the ExposureTimeAbs value you found fixed.
With the steps above, you can configure SW and HW triggers for the Basler ace 2 camera in Pylon Viewer. Mastering these settings makes it possible to build a flexible image acquisition system that meets a wide range of application requirements.